I always thought that invoices are something that only businesses use; until a client asked me for an invoice.
Yes, that might sound dumb! But that’s how we learn.
It is rightly said that necessity if the mother of invention.
When a client asked me for an invoice, I started looking on the internet for invoice templates, thought of creating my own template using Excel, came across several paid online invoicing tools and finally discovered Zoho Invoice.
I was wondering about whether it would be free or paid, easy to use or not and several other questions were there in my mind.
Imagine you are searching for something and are not able to find it. And then finally you find something that can solve your problem.
I thought to explore it and give it a try. And I liked it so much that today I am writing this blog to answer all those questions which I had then and you would be having too while looking for invoicing software.
What is Zoho Invoice?
As per Zoho, “Zoho Invoice is online invoicing software that helps you craft professional invoices, automatically send payment reminders, and get paid faster online.”
Let me simplify things a bit for you.
Lets first talk about what is Zoho all about.
Zoho is an Indian technology company that is known for it’s CRM, office suite, invoicing software, etc. An Invoice is a bill or a document sent by the seller of goods/services to the customer.
Zoho Invoice is an application by Zoho Corporation that helps in creating invoices in a quick and easy manner.
Is Zoho Invoice Free or Paid?
Zoho Invoice is available in both free and paid variants.
With a free plan, you can use as a single user/organization with the maximum limit of 5 invoiced customers.
If you have to create invoices for more than 5 customers, then there are various paid options. There are 3 paid plan options – Basic, Standard and Professional.
Basic Plan
Price: $9 per month ($90 per year)
Number of customers you can invoice: 50
1 user
Standard Plan
Price: $19 per month ($190 per year)
Number of customers you can invoice: 500
3 users
Professional Plan
Price: $29 per month ($290 per year)
Number of customers you can invoice: Unlimited
10 users
Features of Zoho Invoice
- Customizable Invoice Templates
- Multi-Currency Invoicing
- Multi-Language Support
- Schedule Invoices
- Workflow Automation
- Monitor Business Performance
- Digitally Sign Invoices
How to use Zoho Invoice?
Getting Started with Zoho Invoice
In order to use Zoho Invoice, you can Sign Up For FREE. You need to pay only if you wish to create invoices for more than 5 customers.
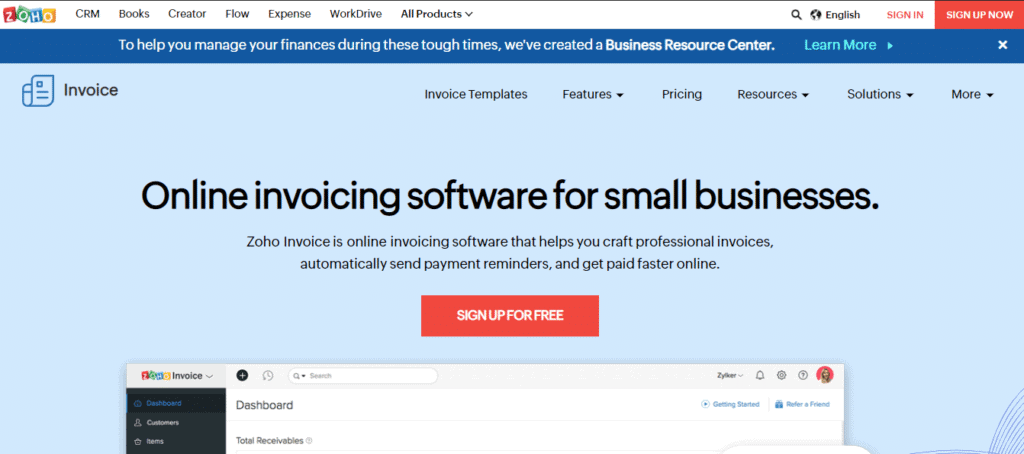
Click on Sign Up For Free
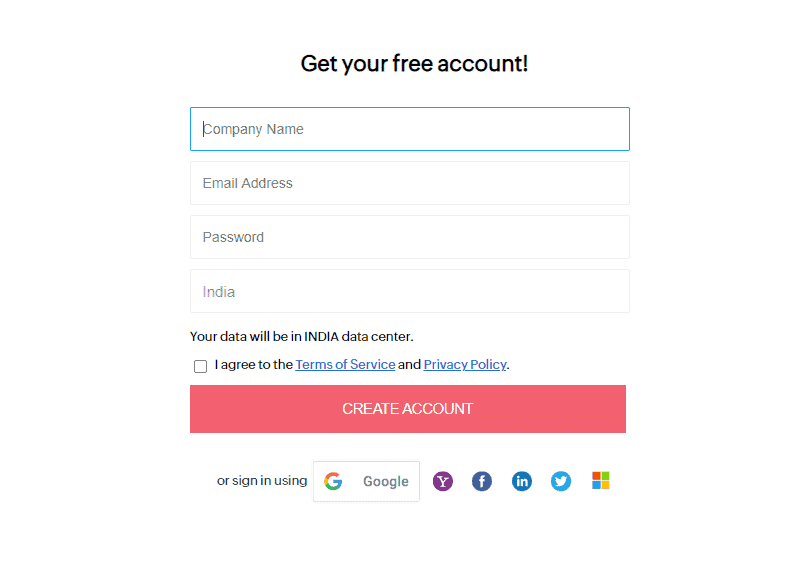
Enter the details and proceed. Within 5 seconds, you would be redirected to the Zoho Invoice’s Lets Get Started Page.
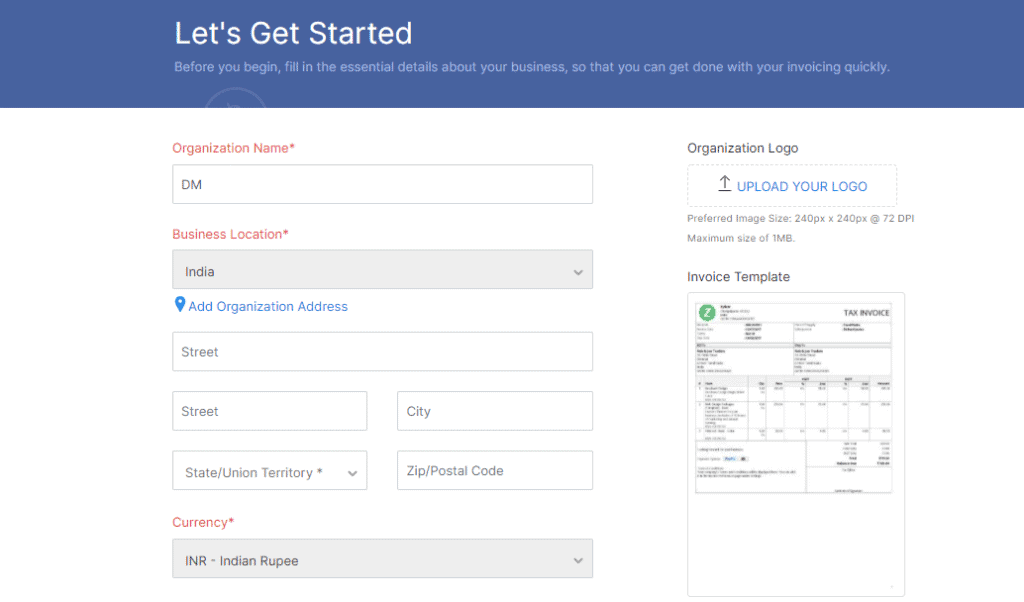
On this page, you need to enter the basic details about your organization like your organization’s name, location, logo, whether your business is registered for GST, etc.
If you are a freelancer, you can write your own name in Organization Name.
That’s it. You can now access Zoho Invoice Dashboard.
A verification email would be sent to your email address that you used while signing up. Do not forget to verify.
Exploring Zoho Invoice’s Dashboard
When you login to your Zoho Invoice, you dashboard will look something like this.
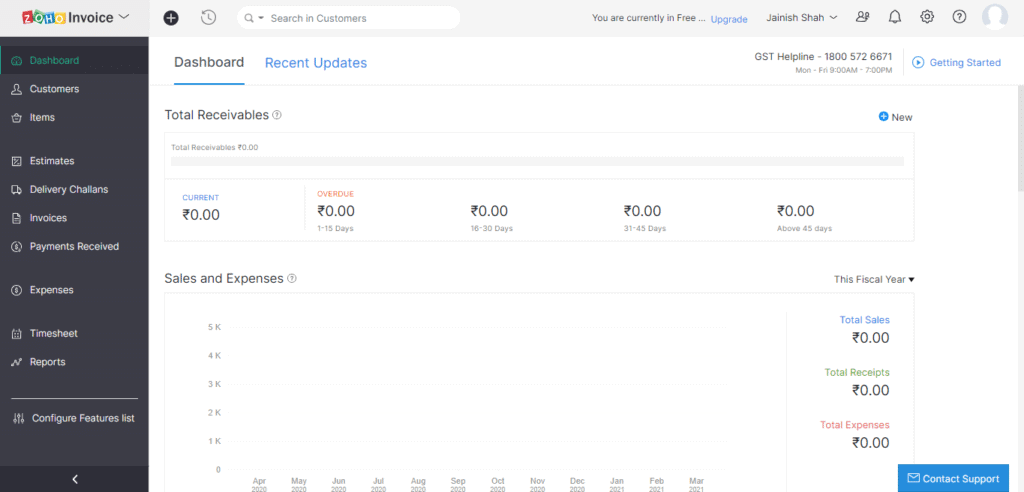
As you can observe in this screen, it gives a detailed view of the total receivables, total sales, total receipts, total expenses, etc.
You can directly start creating invoices from this page by clicking on “New” which appears below the GST helpline number.
The top toolbar lets you search for your customers, change your account settings, lets you upgrade to a paid version and much more.
The toolbar you get in the left hand side consists of several features like:
- Dashboard (The page which we are currently exploring)
- Customers
- Items
- Estimates
- Delivery Challans
- Invoices
- Payments Received
- Expenses
- Timesheet
- Reports
Let us explore a few key features that can help you create invoices like a pro.
Creating your first invoice using Zoho Invoice
It just takes a few clicks to make invoices using Zoho Invoice. There are multiple ways to create invoices using this invoicing tool.
But lets make the first invoice in a very simple way.
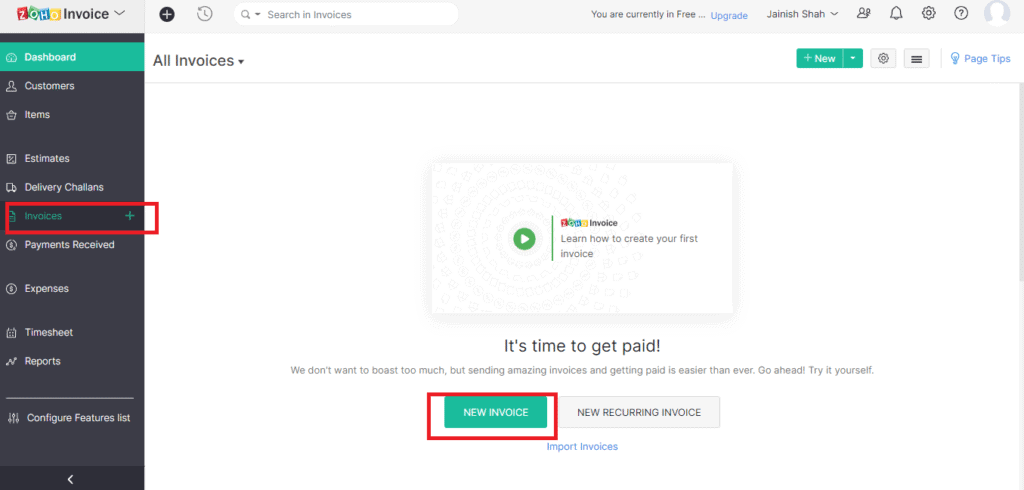
In the left hand side toolbar, click on Invoices. Then click on “New Invoice”
Now as you are creating the invoice for the first time using Zoho Invoice, you will get a popup “Set your transaction preferences”
You can set the preferences here at your convenience. You can also change this later from Settings. As of now, I am keeping the default selection and clicking on Save & Continue.
Now, New Invoice Page will be displayed.

Now, the very first field is Customer Name.
As we have not yet added the list of customers, we need to type the name of the customer & a new customer popup will come up.
Enter the customer details and click on Save.
Enter the other details as needed & scroll below.
You will come to the “Item Details” section.
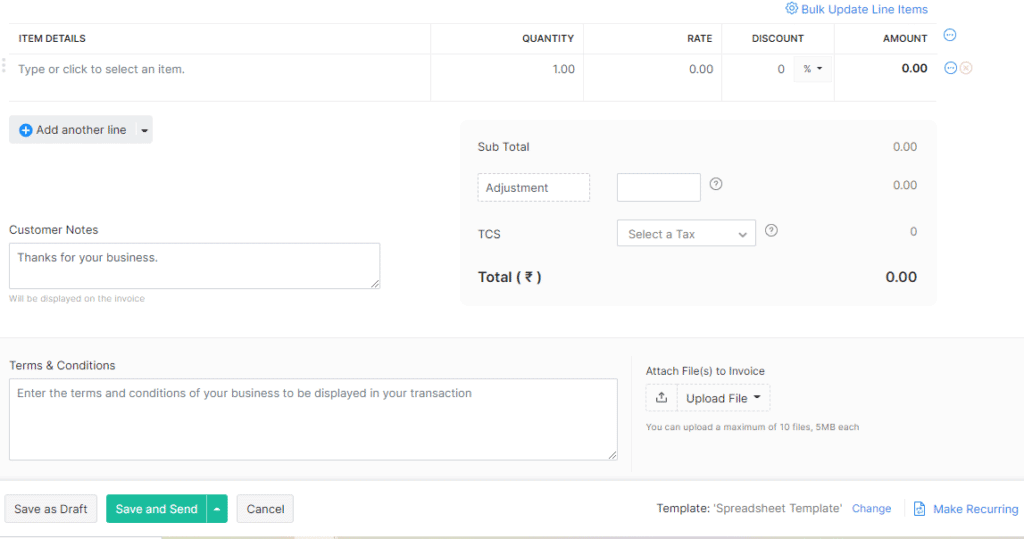
Here, you can enter the details of the item (goods/services) that is being sold along with the quantity, rate and discount.
You can add multiple line items and the total will be computed automatically on the basis of items you enter.
Another fantastic feature of Zoho Invoice is that it allows you to create a list of items like a catalog and all you need to do is add those items to the invoices when and where required.
You can use the Customer Notes section to add a thank you note or some message for the customer. Likewise, you can also mention the terms & conditions and upload supporting files to the invoice.
The invoice can be saved as draft if you wish to continue editing it later & the “Save and Send” button gives you 4 options. Click on the arrow next to the button and you will see the following 4 options:
- Save and Print
- Save and Send
- Save and Share
- Save and Send later
Once you send the invoice, you can find the invoice in the Invoices section.
Adding Customers to your Zoho Invoice Account
While creating invoice, you were prompted to add customer. Remember?
Zoho Invoice allows you to add customers in your account so that you don’t have to type the details of the same customer again and again.
A customer can be added while creating an invoice and also directly in the Customers section by clicking on “Customers” in the left hand side toolbar.

You can see all the added customers along with their receivables on this screen. You can also add a new customer by clicking on “New” button.
Remember, you can add only 5 customers using the free plan of Zoho Invoice.
Once you have added the customers in this section, the next time you create an invoice, you don’t have to type in that customer’s detail again. You can just select it from the drop-down.
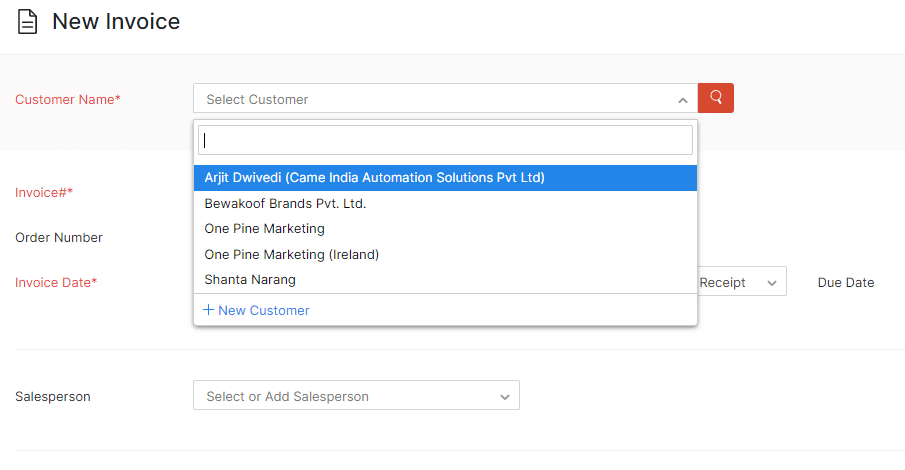
Just select the customer from the drop-down and go ahead with the invoice creation.
Making a list of your goods and services in Zoho Invoice
Just as we can add Customers in Zoho Invoice, we can also add the commonly sold goods and services in the items list in Zoho Invoice.
This saves a lot of time while creating invoices. You don’t have to enter the same product details again and again while creating different invoices.
Go to “Items” in the left hand side toolbar and click on “New”.
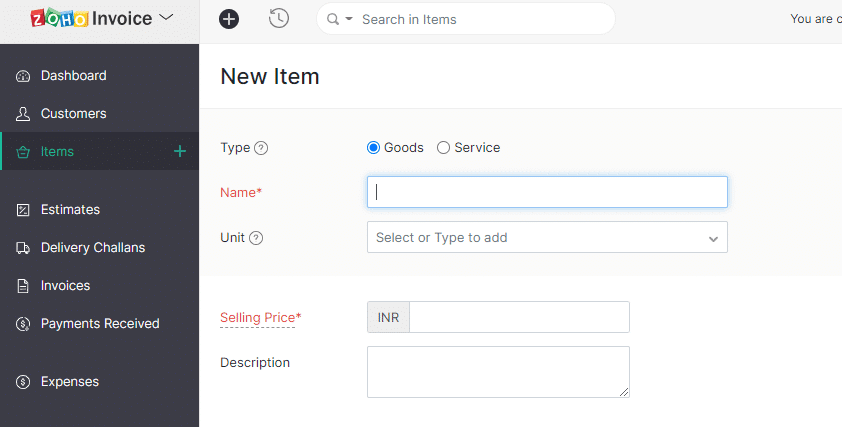
Enter the name of the product. Unit lets you select the measurement of the item in kgs, cm, pcs, etc. Enter the selling price, description and click on Save.
Likewise, add all the commonly sold items (goods/services) here.

Now the next time when you will create the invoice, you will get the added items in the drop-down. You will just have to select the desired item and it will get populated along with its price.
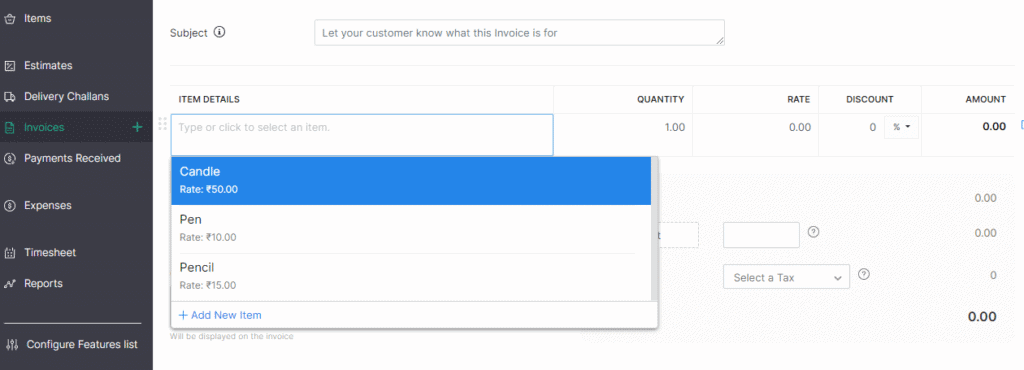
Just select the item and modify the quantity. You can also modify the rate.
This catalog of items and customers help you in quickly and easily creating invoices.
Conclusion
There are a lot more features of Zoho Invoice. I have just tried to introduce you to a few most helpful features of this wonderful invoicing tool.
I would recommend you to try out things once and explore more. Its easy, quick and free (till 5 customers)
In case you need any further assistance, then please let me know in the comments section below or reach out to me on Instagram/LinkedIn.
1 thought on “Zoho Invoice – What is Zoho Invoice & How to use it?”